On the Domains page, click "Connect Domain(s)" and enter the domain(s) you own (yourcompany.com, no https://). The standard setup is to change the domain's nameservers to the ones Winnr gives you, then click Check Nameservers. Winnr then manages every record (MX, SPF, DKIM, DMARC) for you. If your domain is registered at Cloudflare or already uses Cloudflare for DNS, Winnr offers to use a Cloudflare API token instead, and a manual record-by-record option is available as a last resort. The domain goes Active once the change is detected and setup finishes.
Three ways to connect, in order of preference
- Change your nameservers to Winnr's (the default). At your registrar, replace the domain's nameservers with the ones Winnr shows you. Winnr then hosts the zone and creates and maintains every mail record automatically. Works with any registrar, and there's nothing to keep in sync afterwards.
- Cloudflare API token. Domains registered at Cloudflare can't change their nameservers, and domains already on Cloudflare DNS often shouldn't. When Winnr detects either case, it asks for a scoped Cloudflare API token instead, writes the email records into your existing Cloudflare zone, and leaves everything else untouched.
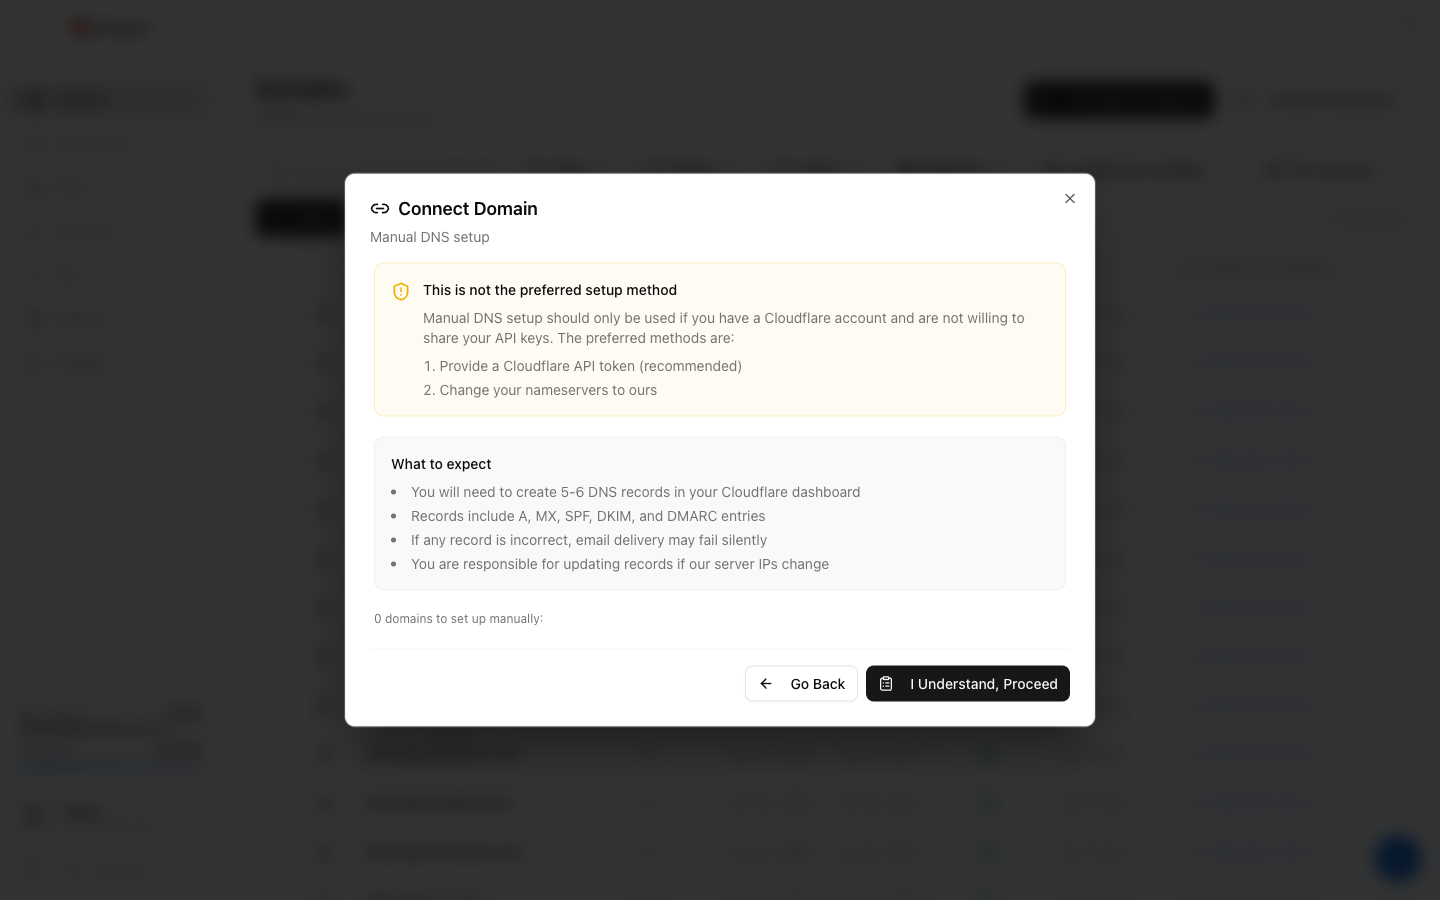
- Manual (last resort). Winnr lists the records and you create them yourself at your DNS provider. The app flags this as "not the preferred setup method", because a wrong record can make mail fail silently and you have to update records yourself if server details change.
Detail on each: How DNS setup works for connected domains.
Connect in subdomain format (keep your main domain untouched)
Tick Connect in subdomain format in the Connect Domain dialog. Instead of turning the domain itself into a sending domain, Winnr sets up to 5 subdomains under it (up to 10 mailboxes each) and leaves the main domain completely alone. No MX, SPF, or any other record is added at your main domain. Your website and any existing mail (Google Workspace, Microsoft 365) keep working, which makes this the right choice for a live business domain.
Pick your subdomain names (three neutral names are pre-filled), then connect with the manual method (records grouped per subdomain, with a "Download CSV (all subdomains)" option you can hand to whoever manages your DNS) or a Cloudflare API token. The nameserver method isn't available in subdomain format. Full details: Subdomain Strategy.
When to connect vs. purchase
- Connect if: you already own the domain, or you have a specific domain you want to send from.
- Purchase if: the domain is only for cold outreach, you want the fastest setup, or you'd rather Winnr register and configure it for you. Domains bought through Winnr are a one-time cost.
Many customers do both: connect a domain they already own and purchase a handful of dedicated sending domains.
Records Winnr manages
When Winnr controls the zone (nameserver or Cloudflare-token method) it creates and maintains these for you. If you go manual, these are the records you'll copy:
| Type | Name | Value |
|---|---|---|
| A | inbound | Winnr's inbound mail server address |
| MX | @ | 10 inbound.yourdomain.com (priority 10) |
| TXT | @ | SPF (v=spf1 … ending in -all) |
| TXT | dkim._domainkey | DKIM public key (v=DKIM1; k=rsa; …) |
| TXT | _dmarc | DMARC policy (v=DMARC1; p=reject; …) |
Some domains need one or two extra records (for example an additional SPF TXT record on a short subdomain name, or extra sending-authentication records). If you set a redirect on a manual-DNS domain, you'll also need an A record for it. The Connect Domain flow shows exactly what your domain needs. Always copy the values Winnr shows you, never values from other help articles or guides.
The A, MX, SPF, and DKIM records must verify for the domain to go Active.
What's next
Step-by-step
-
1. Open the Domains page
Sidebar → Domains. The "Connect Domain(s)" button sits next to "Purchase Domain(s)" in the top right.
-
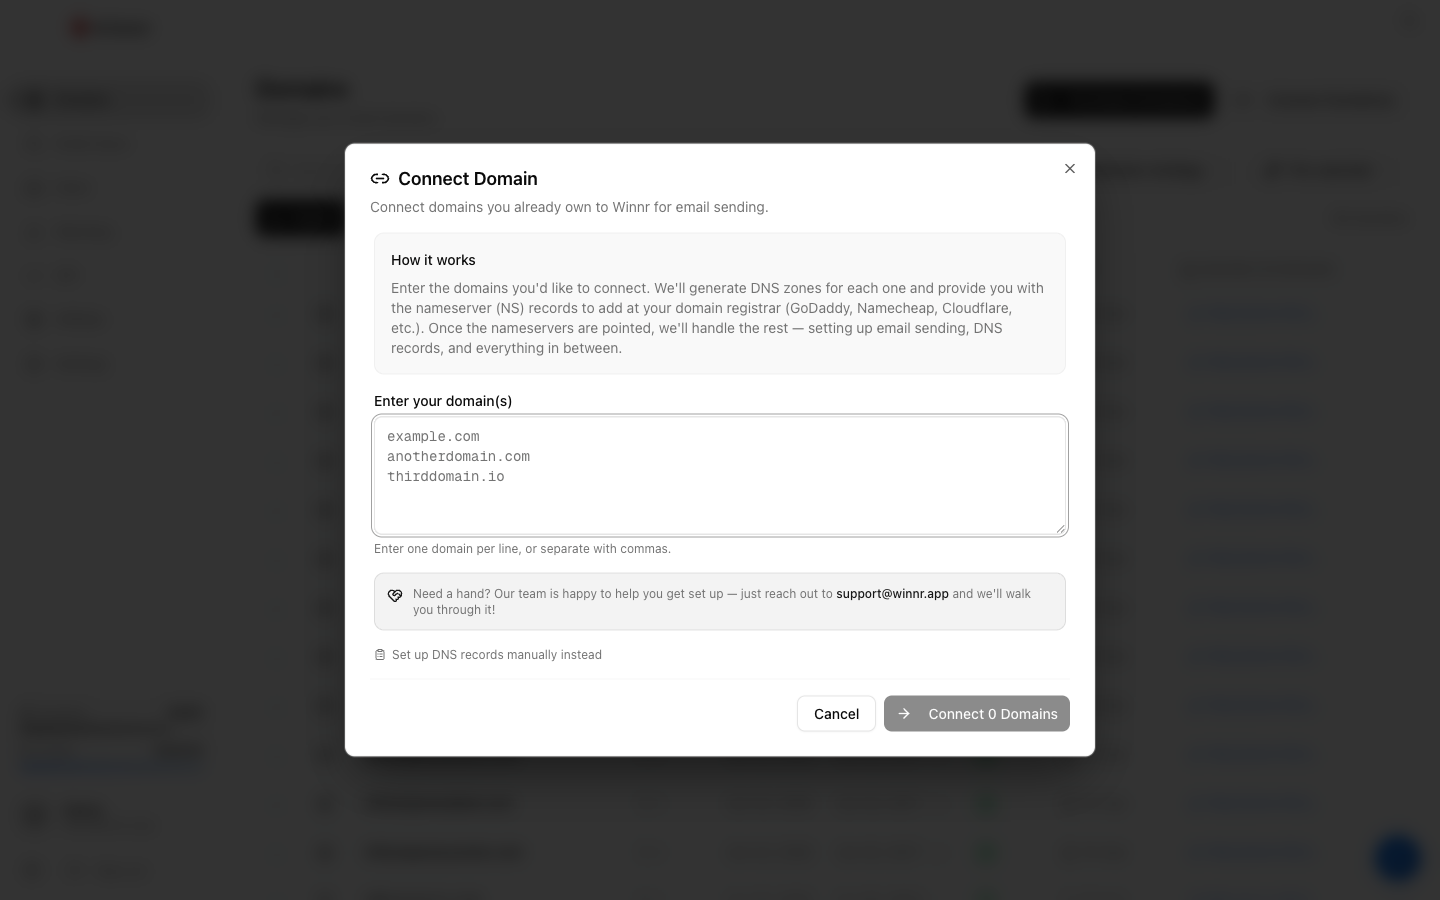
2. Enter the domain(s) you own
Enter one domain per line, or separate them with commas. Use the bare domain (yourcompany.com), with no https:// and no paths. You can connect up to 100 domains at once. Winnr generates a DNS zone for each and gives you the nameserver (NS) records to set at your registrar.
-
3. Point the domain at Winnr
The standard method is to replace your domain's nameservers at your registrar with the ones Winnr shows you (Copy All copies them). It works with any registrar and lets Winnr manage the whole zone. Then click Check Nameservers. If any domain in the batch is registered at Cloudflare (where nameservers can't be changed) or already uses Cloudflare for DNS, Winnr detects that and asks for a Cloudflare API token instead, then writes the records into your Cloudflare zone.
-
4. (Fallback) Set the records manually
Only if you can't change nameservers and won't share a Cloudflare token: click "Set up DNS records manually instead", read the warning, and click "I Understand, Proceed". Winnr lists the records to create yourself (usually 5-6: A, MX, SPF, DKIM, DMARC), with a Download CSV option. Add them at your DNS provider and click "Verify DNS Records" (or "I'll do this later" and verify from the Domains page afterwards).
-
5. Wait for Active status
Once Winnr confirms your nameservers (or the token or manual records), it finishes setting up the domain and it turns Active, ready for mailboxes. Until then the domain shows as Pending NS (nameserver method) or DNS Records Pending (manual method) on the Domains page. Hover the status to see what's needed and re-check.
Frequently asked questions
Do I need to transfer the domain to Winnr?
No. You keep the domain registered at your current registrar. Winnr only needs to manage the DNS, not ownership. This is the "bring your own domain" (BYOD) model.
Can I still use the domain for my main website?
If you point the whole domain's nameservers at Winnr, Winnr becomes the DNS host, so your website records need to exist in the Winnr-managed zone (add them as [custom DNS records](/help/domains/custom-dns-records.html)). The Cloudflare-token method leaves your existing records in place and only adds the email ones. Either way, a standard connect changes the domain's MX record to route mail to Winnr, so if you already run Google Workspace or Microsoft 365 on this domain, don't connect it the standard way or you'll break your existing mail. For an active business domain, connect in subdomain format instead. Winnr then adds records only at the subdomain level and never touches your main domain, website, or existing mail.
What is the subdomain format option?
A "Connect in subdomain format" checkbox in the Connect Domain dialog. It connects your domain as a [Subdomain Strategy](/help/domains/subdomain-strategy.html) domain with up to 5 subdomains, each a full sending domain with up to 10 mailboxes, while your main domain's own DNS (website, MX, SPF) stays exactly as it is. It works with the manual method (records grouped per subdomain, with a CSV download) or a Cloudflare API token. The nameserver method isn't offered in subdomain format, because handing over the whole zone is exactly what this option avoids.
What if I already have SPF or DMARC records?
A domain can only have one SPF record, so Winnr's SPF record replaces yours on a standard connect (two SPF records break authentication). If you already send from this domain with another service, use subdomain format or a fresh domain for cold sending instead.
How long does it take to go Active?
With the nameserver method, it depends on nameserver propagation. It's usually minutes, though it can take up to 48 hours. Winnr starts setup as soon as a nameserver check passes, so click Check Nameservers (or Re-check Nameservers on the Domains page) once you've made the change. The Cloudflare-token method typically takes 1-2 minutes once the token is accepted.
Verification is stuck. What's wrong?
See [DNS verification failing](/help/troubleshooting/dns-verification-failing.html). The usual causes are nameservers not fully switched over at the registrar, old records with a long cache time, or (on the manual path) a record added at the wrong name or with a typo.