In Winnr go to Email Users → Export, choose PipeLime, click Export, then Download CSV. In PipeLime, open your email-account (sender) settings and use the bulk import to add the file's mailboxes. Check the tracking_domain column first: it is filled with each mailbox's own domain, which only works if you have set that domain up for tracking.
PipeLime is a sales-funnel platform with outreach built in. Winnr provisions and warms the mailboxes; PipeLime runs the outreach.
What's in the PipeLime file
| Column | What Winnr puts in it |
|---|---|
| address | The full email address |
| first_name | First word of the display name |
| last_name | Rest of the display name |
| imap_host | That mailbox's mail server |
| imap_username | The full email address |
| imap_password | The mailbox password |
| imap_port | 993 (SSL) |
| smtp_host | That mailbox's mail server |
| smtp_username | The full email address |
| smtp_password | The mailbox password (same as IMAP) |
| smtp_port | 465 (SSL) |
| signature | The mailbox's footer, usually empty |
| tracking_domain | The mailbox's own domain (replace or clear it) |
Check before you upload
- tracking_domain. Replace the placeholder with a real tracking hostname, or clear the column. A domain that does not point at PipeLime's tracking breaks open and click tracking.
- signature. Usually empty. Add a signature here or in PipeLime.
- No sending settings. There are no limit, delay or warmup columns, so PipeLime's defaults apply until you change them.
Daily limit in PipeLime
Set the limit per sender after import: 10 to 20 cold emails per mailbox per day (15 is a good default), and keep each mailbox's total, cold plus warming, at 50 or under. Warm new mailboxes for at least two weeks before they send cold.
What's next
Step-by-step
-
1. Select the mailboxes in Winnr
Open Email Users and tick the mailboxes you want in PipeLime. To take one domain, filter by it and tick the header checkbox. With nothing ticked, the export includes every mailbox in your account.
-
2. Export in the PipeLime format
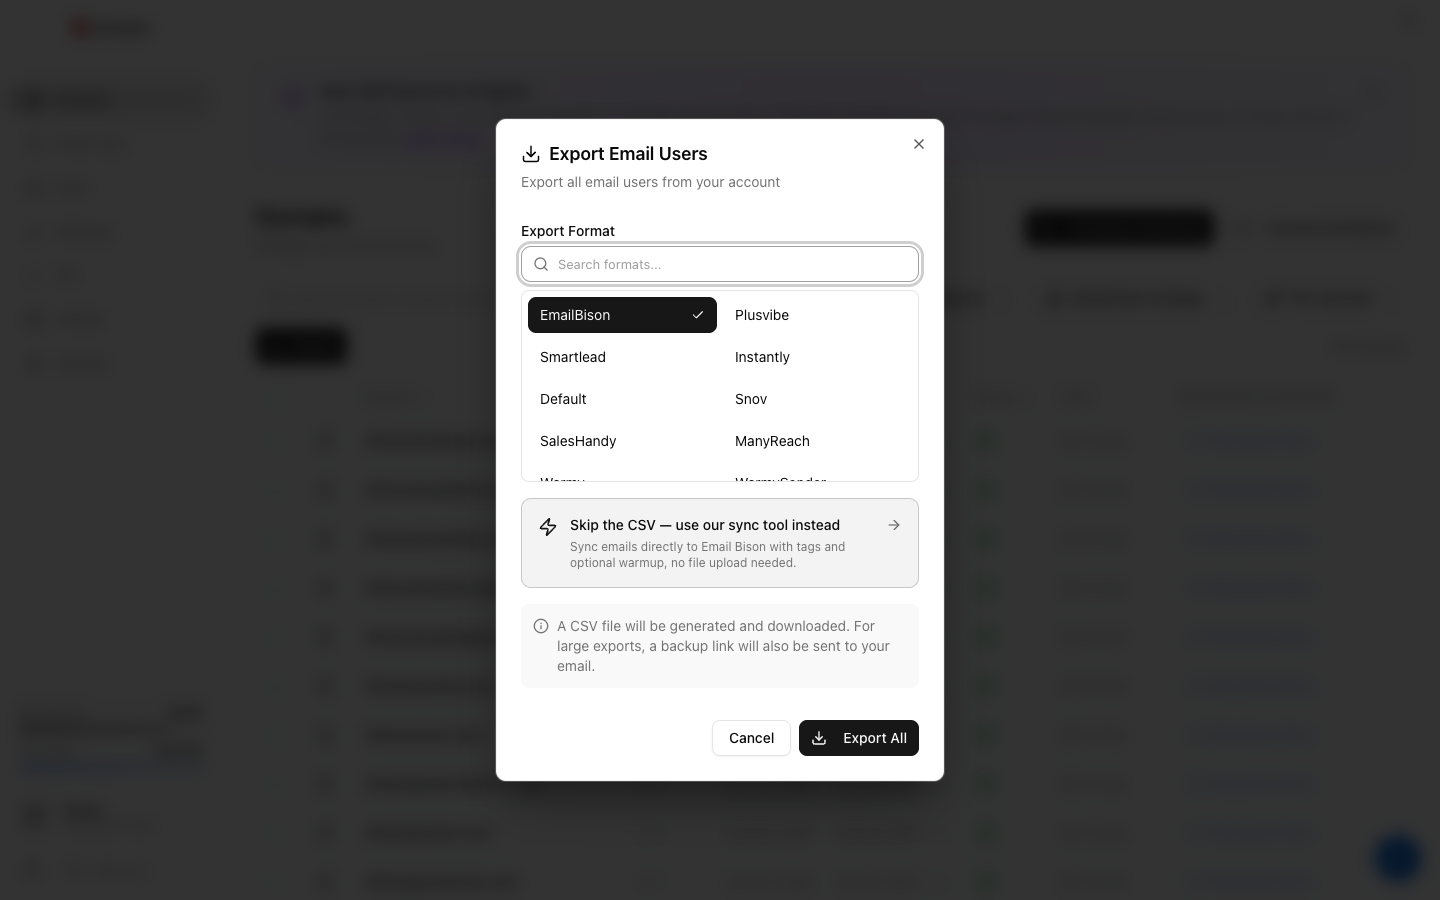
Click Export, choose PipeLime under Export Format (the search box finds it quickly), then click the Export button.
-
3. Download the CSV
Click Download CSV. The link lasts 15 minutes, so export again if it has expired. The file holds passwords in plain text, so keep it private.
-
4. Check the tracking domain
The tracking_domain column is filled with each mailbox's domain. Change it to the tracking hostname you set up for PipeLime, or clear it if you have not set one up.
-
5. Import into PipeLime
In PipeLime, open your email-account (sender) settings and use the bulk import option with the Winnr file.
-
6. Confirm every mailbox connected
Check every mailbox shows as connected before using it in a live campaign.
Frequently asked questions
Why is tracking_domain set to the mailbox's own domain?
Winnr fills it with the mailbox's domain as a starting value. Open and click tracking only works on a hostname that points at PipeLime's tracking, so replace it with your tracking hostname, or clear it.
How do I set up a tracking domain?
Add the CNAME PipeLime asks for on the domain in Winnr (Domains → the domain → DNS Records), then put that tracking hostname in the tracking_domain column.
What daily limit does the file set?
None. The PipeLime file has no limit column, so set 10 to 20 cold emails per mailbox per day in PipeLime (15 is a good default), keeping each mailbox at 50 or under in total including warming.
Should I warm on Winnr first?
Yes. Warm new mailboxes with Winnr's built-in warming ($0.60 per mailbox per month) for at least two weeks before sending cold volume through PipeLime.
A sender fails to connect in PipeLime. What now?
Check imap_password and smtp_password for that row. A password changed in Winnr after you exported will not match the file. Export that mailbox again and re-import it. If a fresh export still fails, see the mailbox authentication troubleshooting guide.